Creating Custom Categories
Categories control how your addons are grouped in the Library Manager. PERFLIGHT ships with four default categories, and you can create your own to organize addons however you like -- for example, splitting liveries into their own group or creating a category for your favorite freeware.
Written By Jim Thompson
Last updated 4 months ago
Getting Started
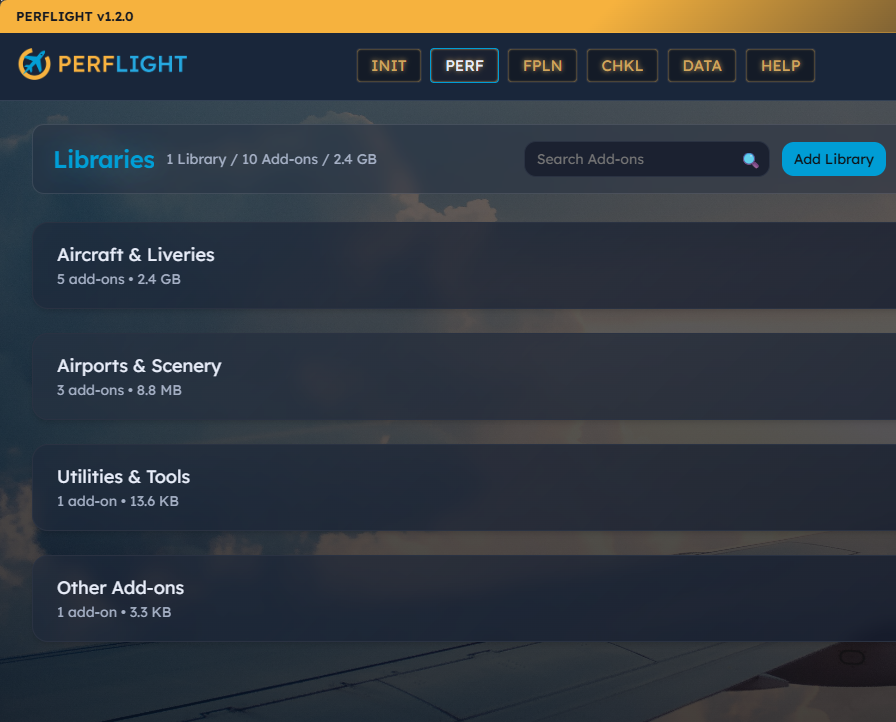
Click DATA in the top navigation bar to open the Data Management page. The Categories section is in the right column, between Simulator Paths and Data Operations.
Default Categories
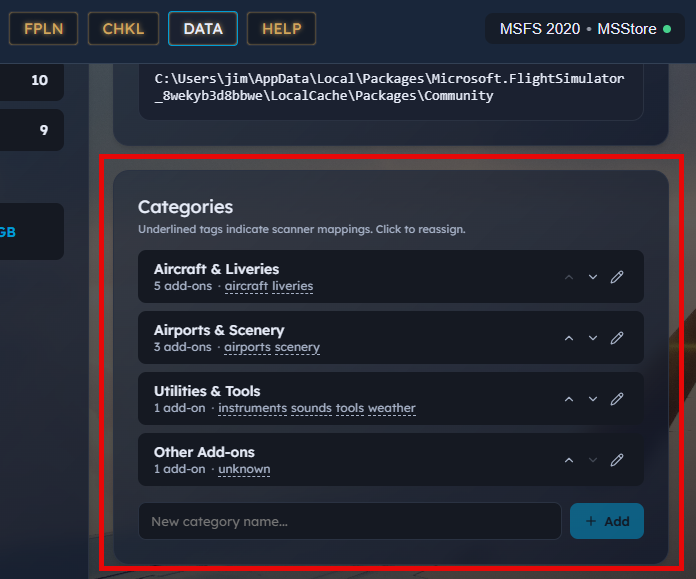
PERFLIGHT creates four categories automatically (shown in the screenshot above)
These defaults are fully editable from the DATA page -- you can rename them, reorder them, and reassign their scanner tags. They cannot be deleted because the scanner needs at least one destination for each tag.
Creating a Category
Type a name in the New category name field at the bottom of the Categories section.
Click Add (or press Enter).
The new category appears at the end of the list. PERFLIGHT auto-assigns a unique color, which is used for gradients on addon cards and hero images throughout the app.
Duplicate names are rejected -- each category must have a unique name
Renaming a Category
Click the pencil icon on the category row you want to rename.
The row switches to an inline editor with the current name pre-filled.
Edit the name and click Save, or press Enter to confirm. Click Cancel or press Escape to discard.
Renaming is safe. If you rename a default category (for example, "Aircraft & Liveries" to "Planes"), the scanner still routes addons there correctly because scanner assignment is based on internal tags, not the display name.
Reordering Categories
Use the up and down arrow buttons on each category row to change the display order. The order you set here is reflected everywhere categories appear: the Library Manager accordion groups, the category dropdown in the Edit Addon modal, and the Data page itself.
Scanner Tags
Now this is the tricky part so pay attention! Scanner tags are how PERFLIGHT's library scanner decides which category a newly scanned addon belongs to. When the scanner detects an addon, it attempts to identify its type (aircraft, liveries, scenery, sound, etc.) and routes it to whichever category holds that tag.
Tags appear as small underlined labels beneath each default category name. For example, the "Aircraft & Liveries" category shows aircraft and liveries tags by default.
Moving a Scanner Tag
You can reassign any scanner tag to a different category:
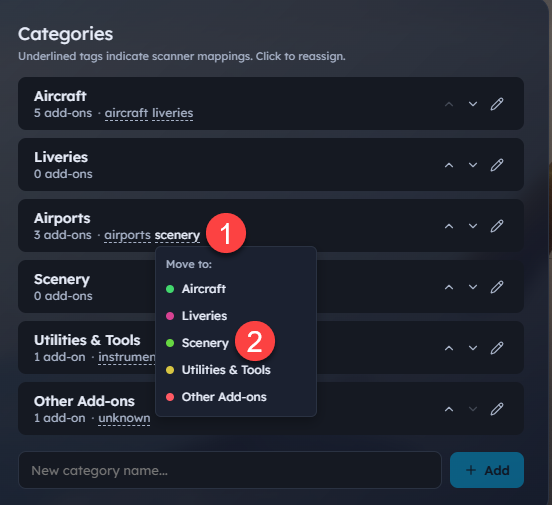
Click an underlined tag on any category row. A popover appears listing all your categories.
Select the category you want the tag moved to.
The tag moves immediately. Any future scans will route that addon type to the new category.
Moving a tag does not retroactively reassign existing addons. It only affects where newly scanned addons land. To move existing addons, edit them individually and change their category in the Edit Addon modal.
Example: Separating Liveries
If you want liveries in their own group:
Create a new category called "Liveries".
Click the liveries tag on the "Aircraft & Liveries" row.
Select your new "Liveries" category from the popover.
Future scans will now place livery addons in the "Liveries" category.
To move existing liveries, open each addon and change its category in the Edit Addon modal.
You may also want to edit the “Aircraft & Liveries” category to only read “Aircraft”?
Assigning Addons to Categories
Every addon belongs to one category. There are two ways an addon gets its category:
Automatic (scanner): When you scan a library, the scanner detects each addon's type and assigns it to the category that holds the matching scanner tag.
Manual: Open any addon's edit modal (click the addon, then click Edit) and choose a category from the dropdown. This overrides the scanner's assignment.
Manual assignments stick across rescans -- the scanner does not overwrite a category you set by hand.
Tips
Start with the defaults. The four built-in categories work well for most users. Add custom ones only when you find yourself wanting a finer split.
Use scanner tag reassignment to customize where new addons land without having to manually recategorize each one.
Category colors are automatic. Each category gets a distinct color so you can tell groups apart at a glance in the Library Manager. You do not need to pick colors yourself.
Renaming defaults is safe. Call them whatever makes sense to you -- the scanner routing is not affected.
Featured in the 1.2.0 Version Update release video